Gauge 1 LMS 2F Fowler Dock Tank Steam Engine Model
History of the LMS 2F Dock Tanks
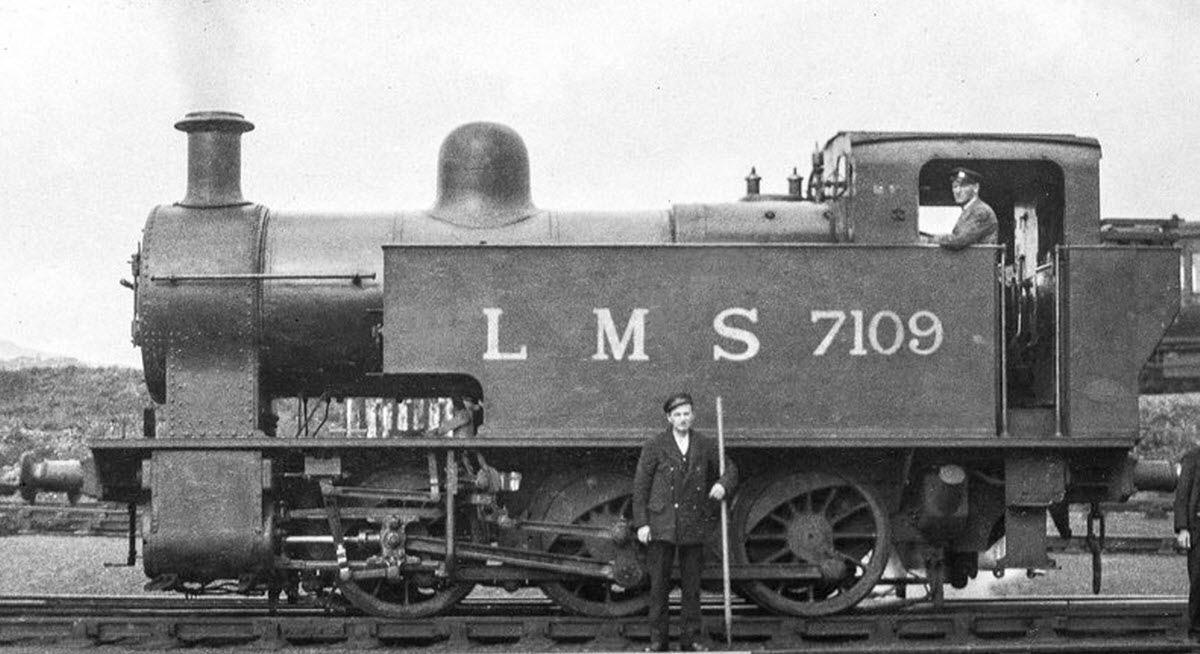
The LMS 2F dock tanks were designed by Sir Henry Fowler and built at Derby Works from 1928 to 1929. They were built by the London, Midland and Scottish Railway (LMS) and designated Class 2F.
The locos were 0-6-0 tanks with outside cylinders and Walschaerts valve gear. They operated originally as shunting engines only to be used in docks but after the railways were nationalised in 1948 the new British railways allowed them also to be used on branch lines.
Full Size LMS 2F Fowler Dock Tank
Why I Decided To Build A Gauge 1 Model Of The LMS 2F
I had always wanted to build some live steam model locos and was interested in Gauge 1 because I saw that scale as being small enough to allow a quick build yet large enough for the locos to be called ‘models’ rather than ‘toys’.
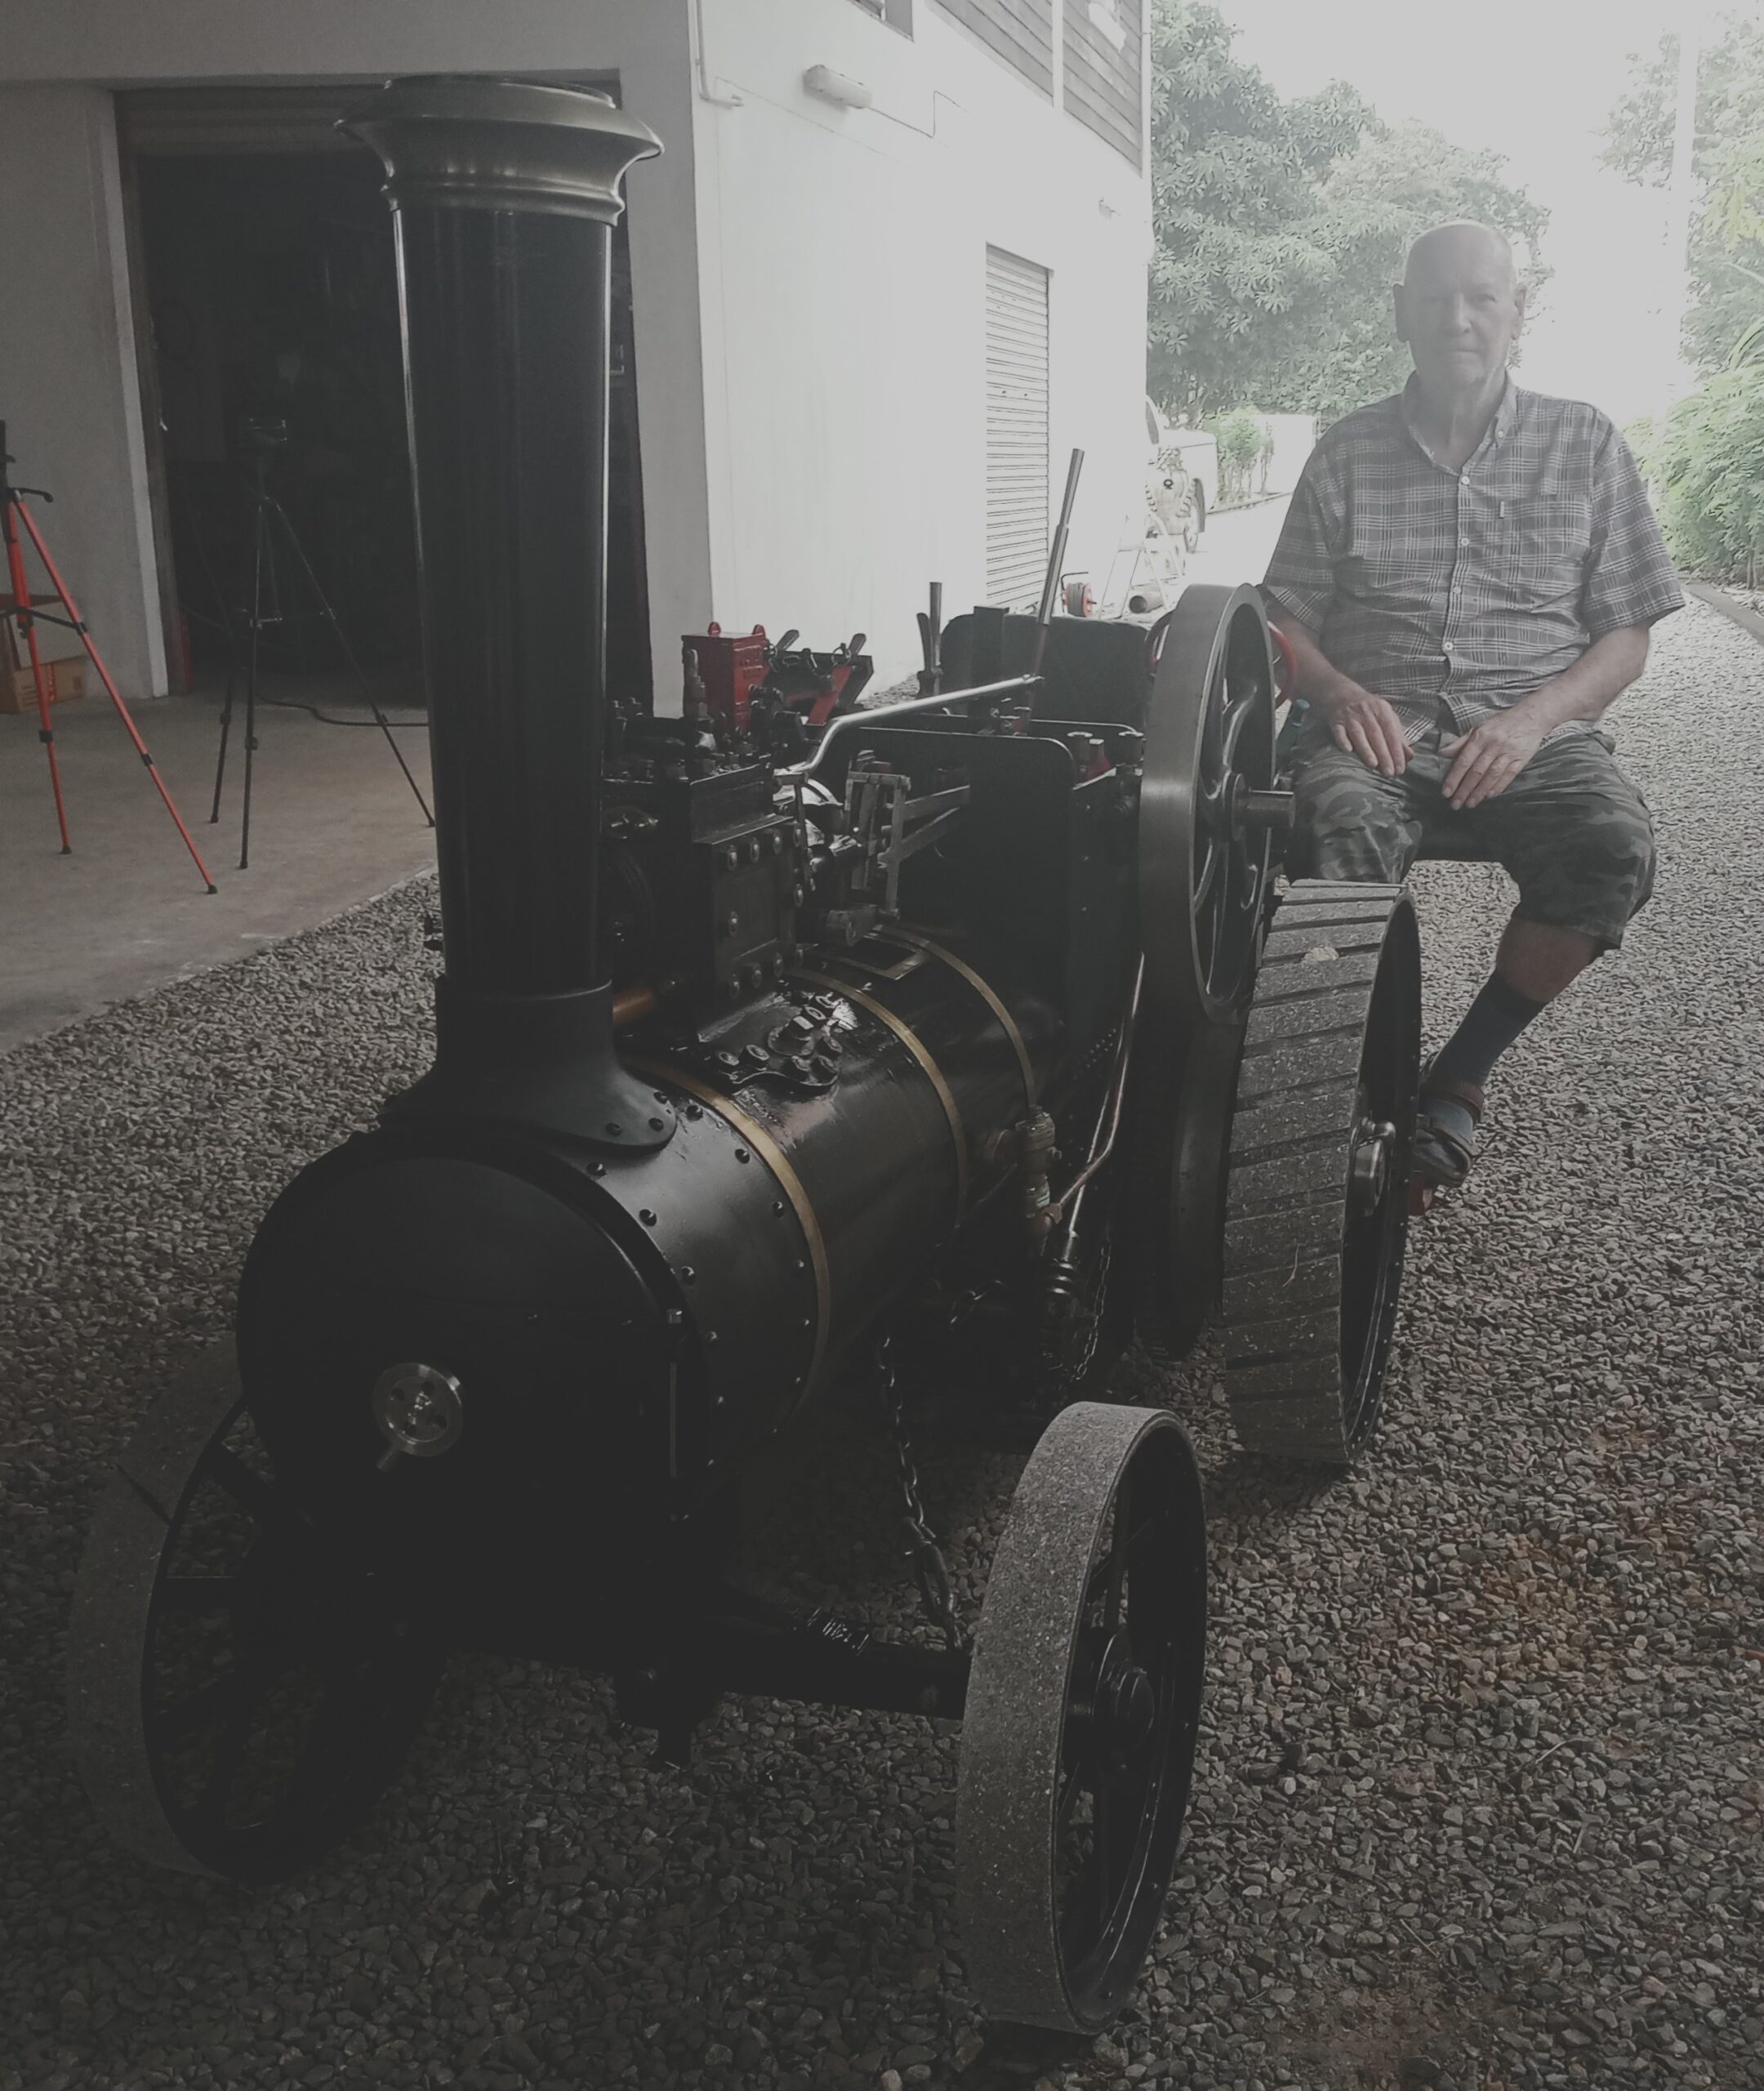
Image Of Alan’s 6 Inch Scale Little Samson Traction Engine Ready For A Steam Run
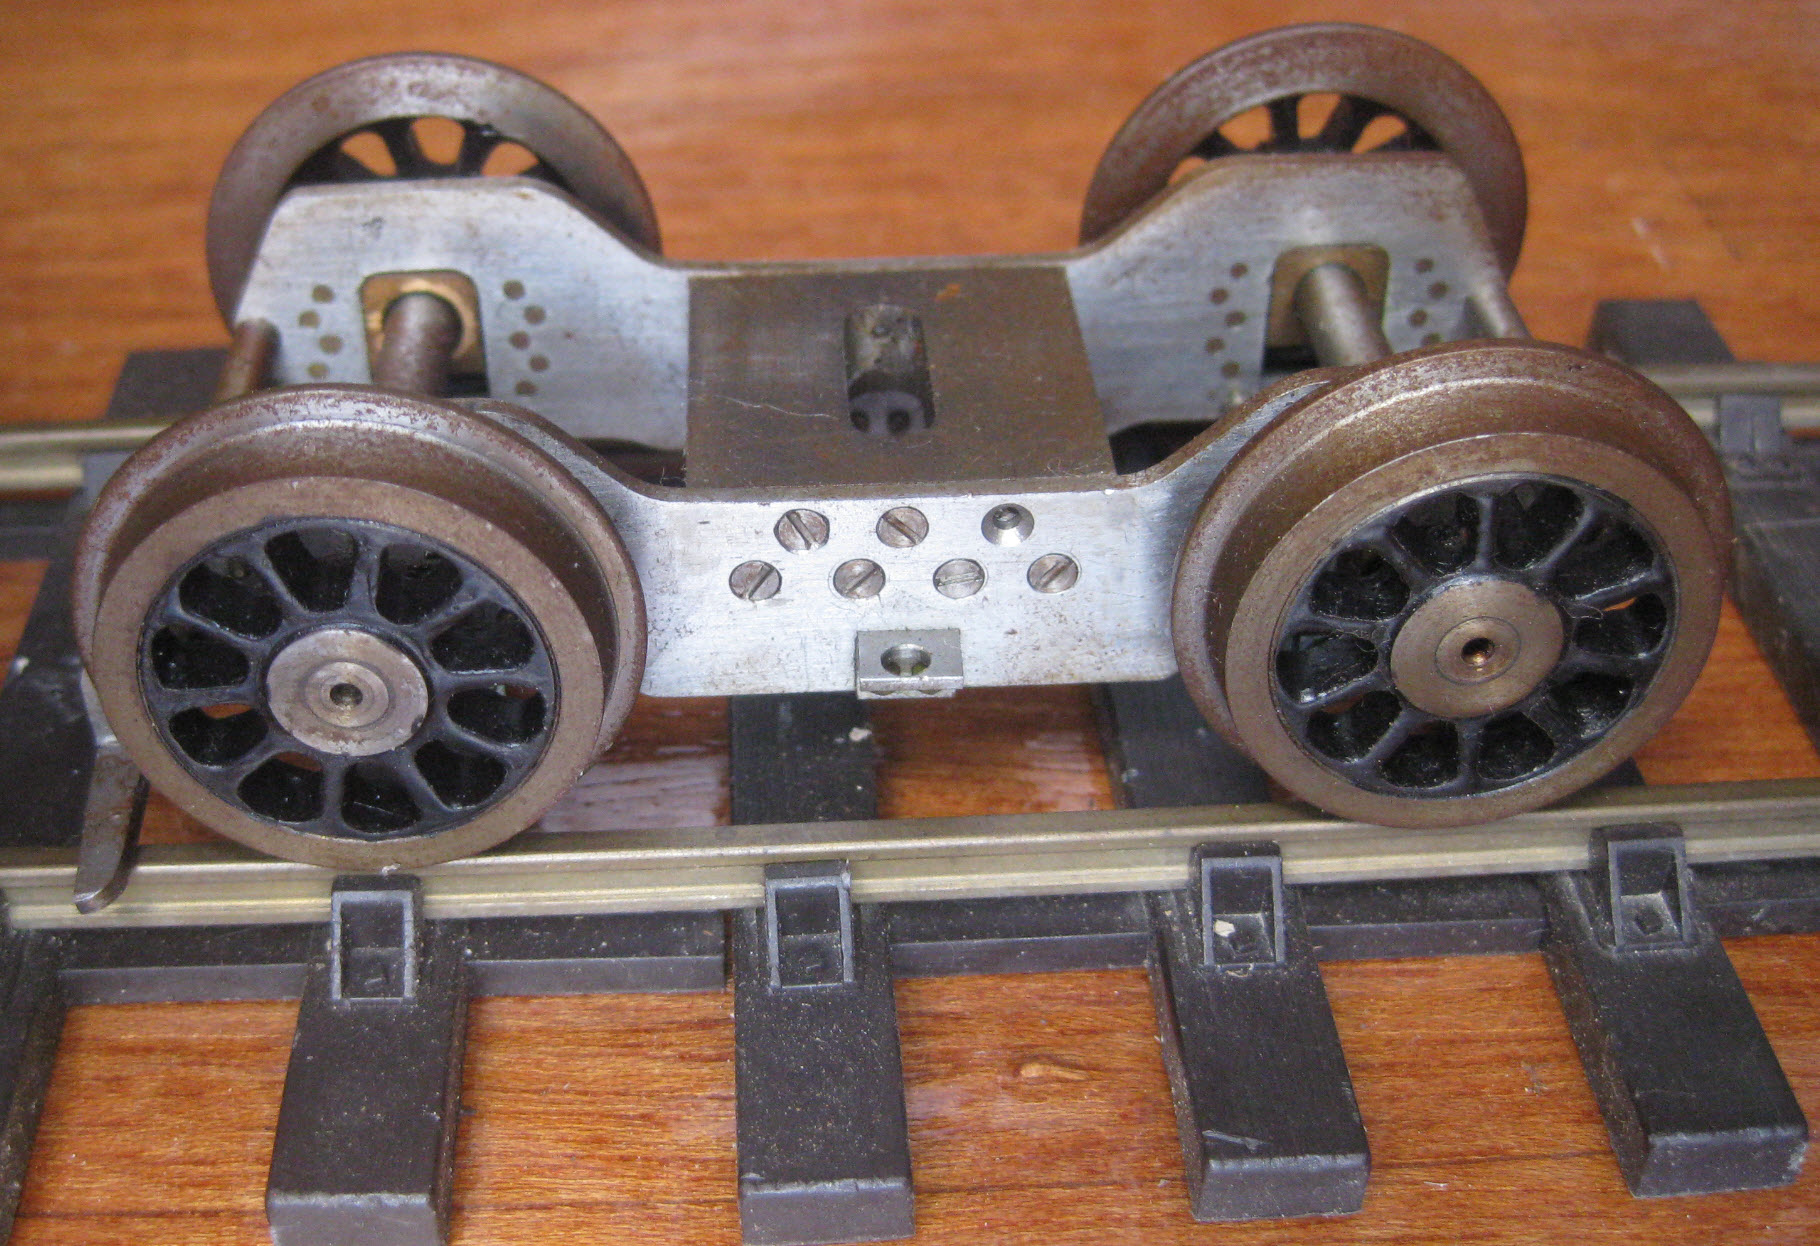
I wanted a change and to build something ‘quickly’. I always had an interest in Gauge 1 which has a scale of 10mm (about 3/8″) to the foot and a track gauge of 1 3/4″. In fact I had already started to build a Stanier Black Five many, many, years ago and got as far as completing the bogie as illustrated here:-
General View Of The Gauge 1 Black Five Bogie
Gauge 1 is often used for garden railways – it is big enough to run a large sized track at ground level or elevated around the garden but not large enough to pull passengers.
Below is a YouTube movie of My LMS 2F Dock Tank Loco Running on Gauge 1 Track in Thailand. Please visit my YouTube Model Engineering In Thailand Channel and watch plenty more model engineering in Thailand movies.
My LMS 2F Dock Tank Loco Running on Gauge 1 Track in Thailand
Other advantages of Gauge 1 over larger gauges are that they are visually more pleasing (you can see the valve gear in action for example) and the cost of the running track is much lower than the larger gauges.
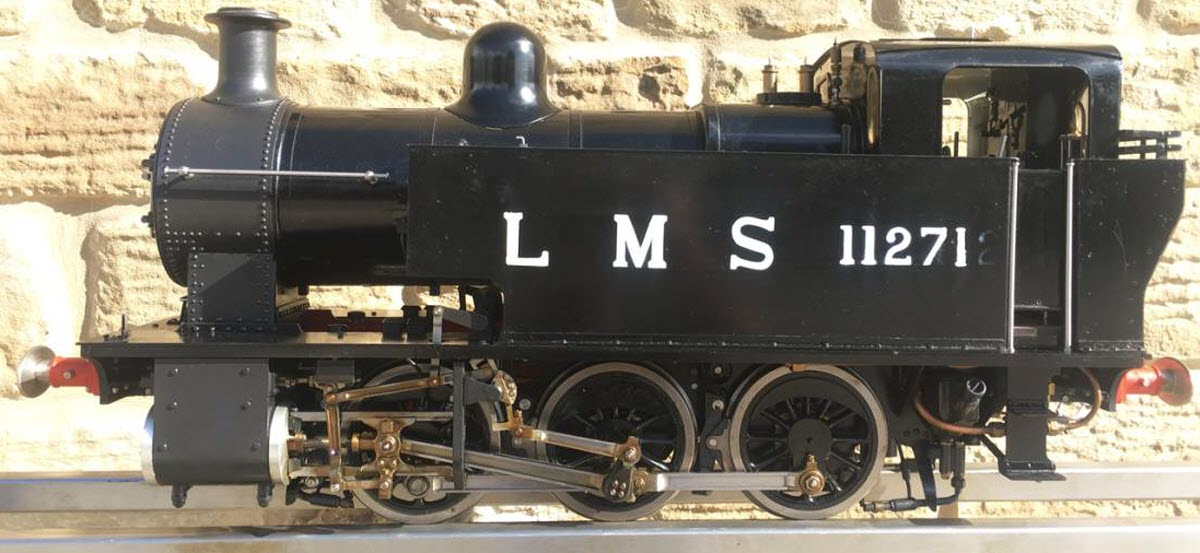
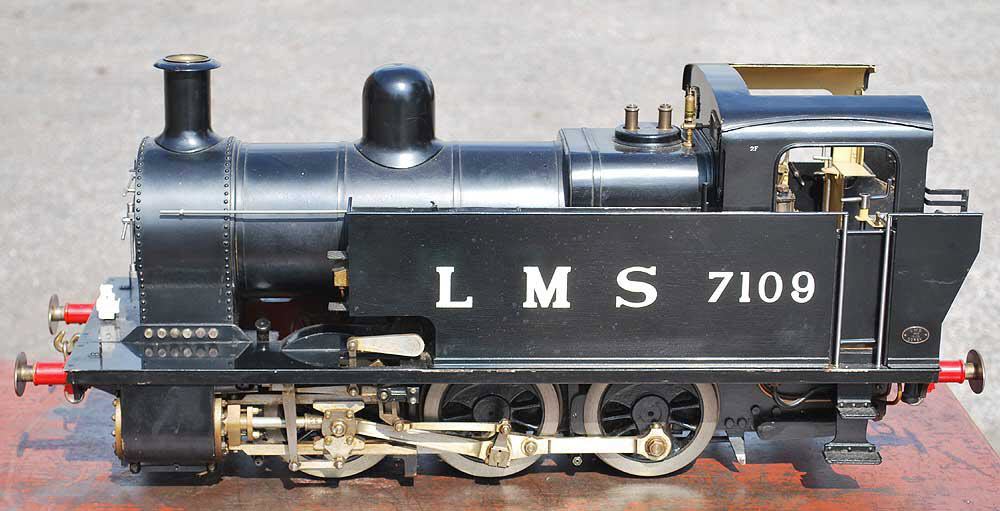
Plus, of course, you could build several Gauge 1 locos in the same time as you could build say one 5″ gauge loco. here is a splendin example of a 5″ gauge model of an LMS 2F Fowler dock tank:-
LMS 2F Fowler Dock Tank Model – 5inch Gauge Side View
In fact I built my model 2F to Phase 1 stage (running on track in the garden) in just three months. (video)
Why Build A Fowler LMS 2F Dock Tank?
A major reason for choosing this type of prototype to model was – I liked the look of it!
In particular it had outside cylinders and Walschaerts valve gear. The Walschaerts valve gear is fascinating to watch in motion. you can see it on a garden rail (Gauge 1) sized loco as a bystander but if you build a larger passenger hauling loco (e.g. 3 1/2″ gauge or bigger) you won’t be able to see it when you drive it.
This is another reason why I chose a Gauge 1 scale model and incidentally why I like traction engine models – you can see the motion in action.
Another reason I chose this model was that the main flat metal parts were available as laser-cut plates. More about this in the next section.
This is an extremely fast and very precise process to get parts produced. (I must write an article on this process)
In the UK model engineers don’t use EDM very much but they do use water-jetted parts and more commonly laser-cut parts.
There is a company in UK that produces laser-cut ‘kits’ of parts for steam locos amongst other things. They are not model ‘kits’ as you might expect. To me a ‘kit’ includes everything you need; castings, bar and plate material and drawings. In this case what is offered are laser-cut parts of the flat plate items only.
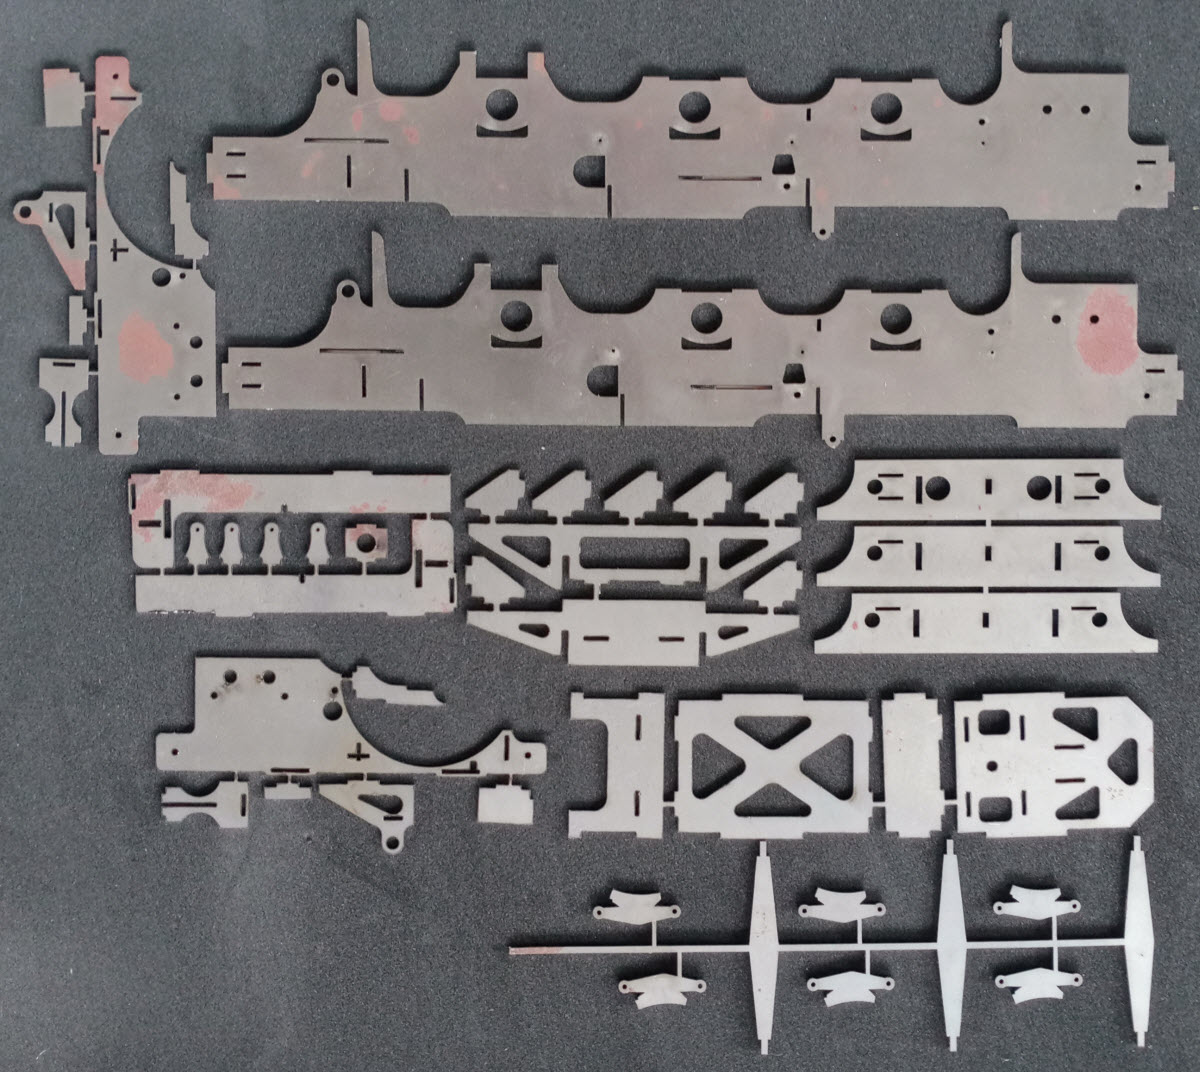
I saw that they made laser-cut parts for a Gauge 1 LMS 2F Fowler Dock Tank. These parts are flat plates of brass and steel. They have laser-cut slots and associated tabs so that in theory you just push the tabs into the slots to assemble the model.
LMS 2F Gauge 1 Laser Cut Frame Parts
Anyway I bought a set of parts for this steam engine in Gauge 1 in May 2014 – nearly 9 years ago as of today’s date (14 January 2023) and had been waiting for this opportunity to build it.
Building An LMS 2F Gauge 1 Loco from Laser-Cut Parts – Phase 1 Phase 2
Phase 1
I thought that building the loco model from the laser cut parts would be extremely quick, After all it seemed just like sticking together those cardboard toys we had as kids.
So I envisioned this part of the build as Phase 1 i.e. to get a chassis and superstructure running on rails in the garden ASAP.
I stated this as much in my email to colleagues on 6th October, 2022. In fact, here is the email:-
Subject: My Next Challenging Project Decided
‘Afternoon Gentlemen and I’m pleased to announce my next project, which is an enormous challenge I have set myself.
Although I’ve been busy in the workshop since completing the 6″ Little Samson Traction Engine (LSTE) (catching up with jobs put off ’cause of the LS build including some long promised workshop machinery) I feel the need to start another major challenge.
Great as it is to have completed the LSTE and to have such a large and powerful engine it has become clear to me that having accomplished that ‘anything is possible’. A ‘normal’ project just won’t cut the ice anymore – it’s got to be something so challenging to build that I almost won’t be able to do it.
It’s this newly realised feeling of ‘being invincible’ and that ‘anything is possible’ that leads me to bet that Fergal will have his 8″ LSTE finished within a year.
So what’s so challenging about my new project, then?
Sorry it isn’t another traction engine, rather it’s a railway loco. An LMS 2F Fowler Dock Tank:-
LMS 2F Fowler Dock Tank Model – 5 inch Gauge
Here’s the kicker, though: I’ve set myself the challenge to have it running before the end of this year! (i.e. before 31st December 2022)
I know that’s a tall order but this is what makes it even more difficult than at first glimpse. I have to buy any necessary parts (example castings) or tools needed from the UK and get them delivered to Thailand. And Christmas time in UK is not the easiest time to buy things by mail order.
So there we go. Better start making a shopping list and place some orders.
I achieved that goal as recorded in may email dated 31 December 2022, as follows:-
Subject: Little Loco Running Progress
Gentlemen, good evening and I wish you a happy New Year.
Little loco progress pics taken an hour ago. (G1 LMS 2F Fowler Dock Tank)
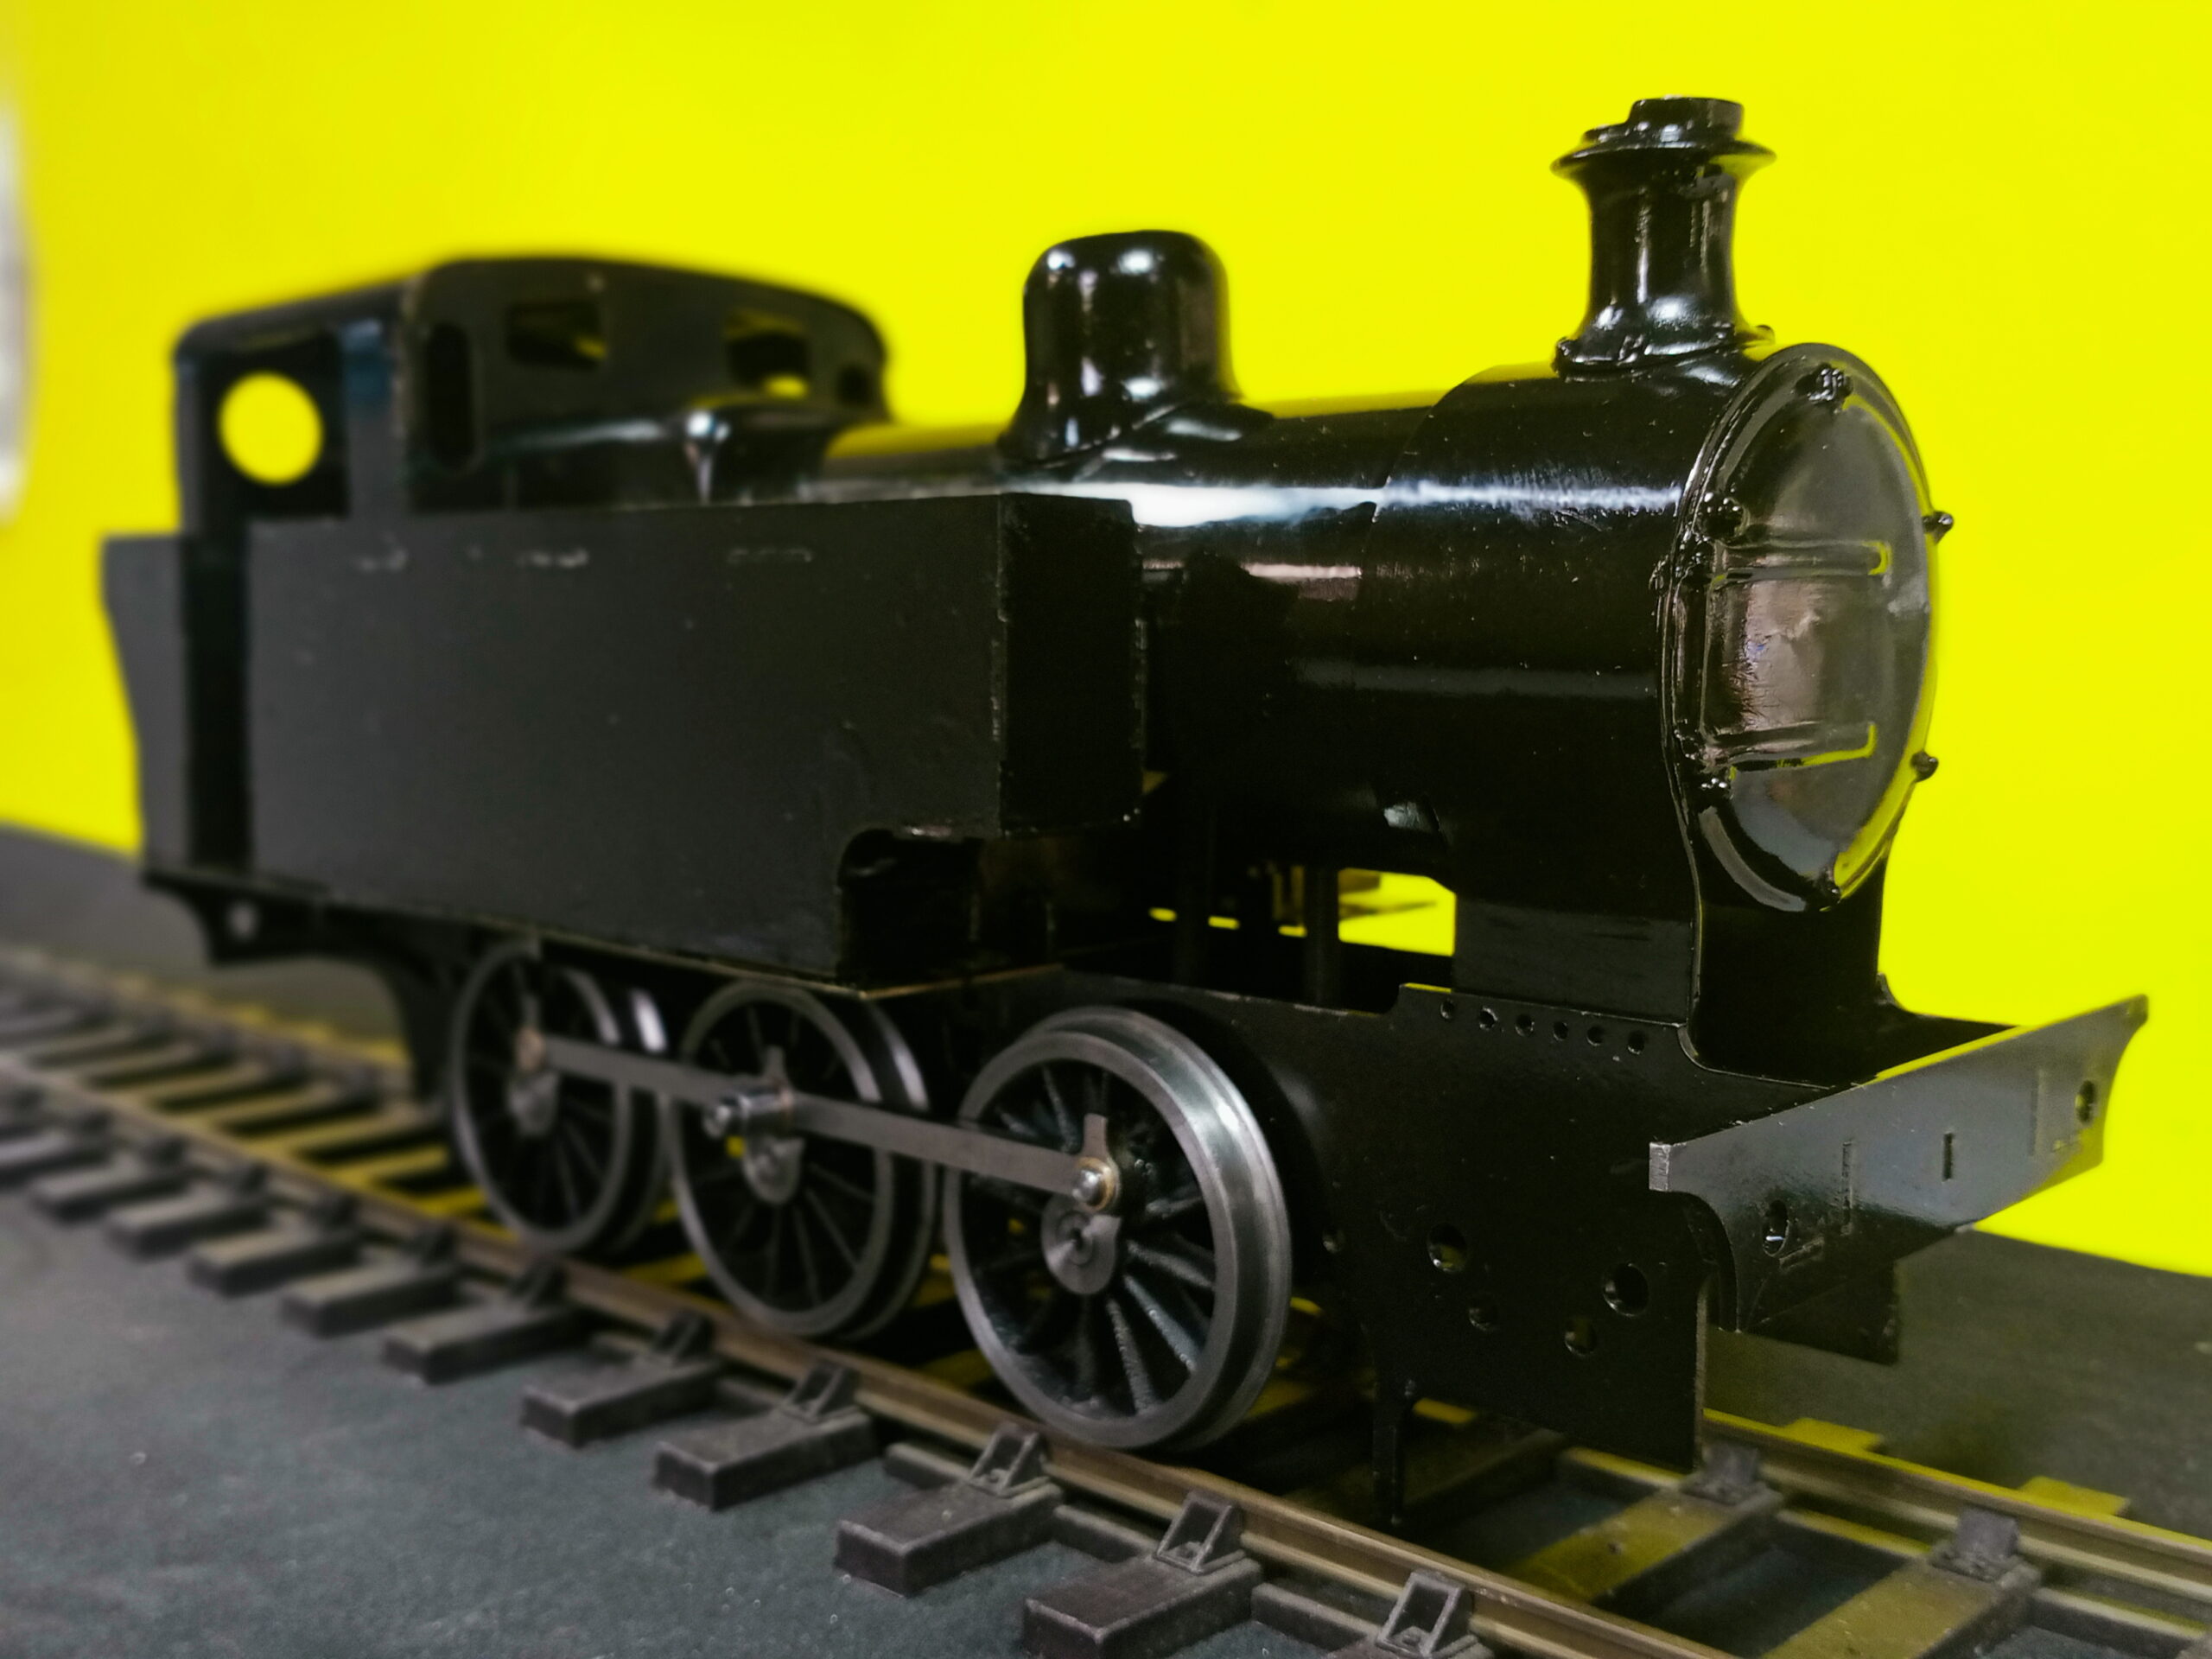
LMS 2F Dock Tank Ready for Running 31 December 2022
When running the coupling pins screw out (predictably) so I have to glue them in before making the vids. Also it’s a bit janky due to the centre/centre distances on the coupling rods being slightly out.
This is despite me taking great care to get them exact. At this scale fractions of a thou are important. No 6 thou running clearances here!
Painting is a bit rough and sharp-eyed viewers will note that the coupling rods are on upside down on the left hand side. I’ve had the rods and wheels on and off about a dozen or more times today trying to get smooth running. Nearly there.
Look out for the running movies maybe tomorrow.
In the meantime, here’s a seasonal (White Christmas scene) short movie of a steamy, smoky, full sized LMS 3F tank engine. (Mine’s a 2F)
Of course although the loco was actually running on rails then, it was only on 4th January that I had it running in the garden and was able to make this movie – just 3 months after declaring a start on the project:-
(movie)
I was aware that completing the construction of the steam power drive (boiler, cylinders, valve gear) was impossible in the time frame I had set myself. I had to find another way to temporarily run the engine without steam.
So, although the engine was running at that time, in order to meet my target running date I had had to make some compromises. The biggest of which was that the loco was running powered not by steam but by an on-board electric motor with electrical power supplied via the rail track from a battery pack! (images)
So it still remains for me to complete the remainder of the loco with all the steam running gear, boiler, cylinders, valve gear etc. This batch of work I call Phase 2.
Many of these parts, of course, are not in the laser cut parts ‘kit’ but I have to scratch-build them myself. This will take a few months. About 9 months I expect is sufficient but much depends upon what else I decide to invest my time in.
Conclusions On Building A Model Steam Locomotive From Laser Cut Parts
The laser cut parts include most of the parts cut from steel sheet for the Walschaerts valve gear so at this stage any conclusions on the benefits/drawbacks of using a laser-cut ‘kit’ of parts as a means to build a model loco quickly would be incomplete, since I haven’t built the valve gear yet.
Of course the complete loco isn’t finished yet so such a report will have to wait until the loco is more complete.
But my experience to date of building the frames (cut from steel sheet) and superstructure (cut from brass sheet) can be summarised:-
It undoubtedly saves time when things just slot together nicely (pun intended) but it’s not always as simple as it first appears.
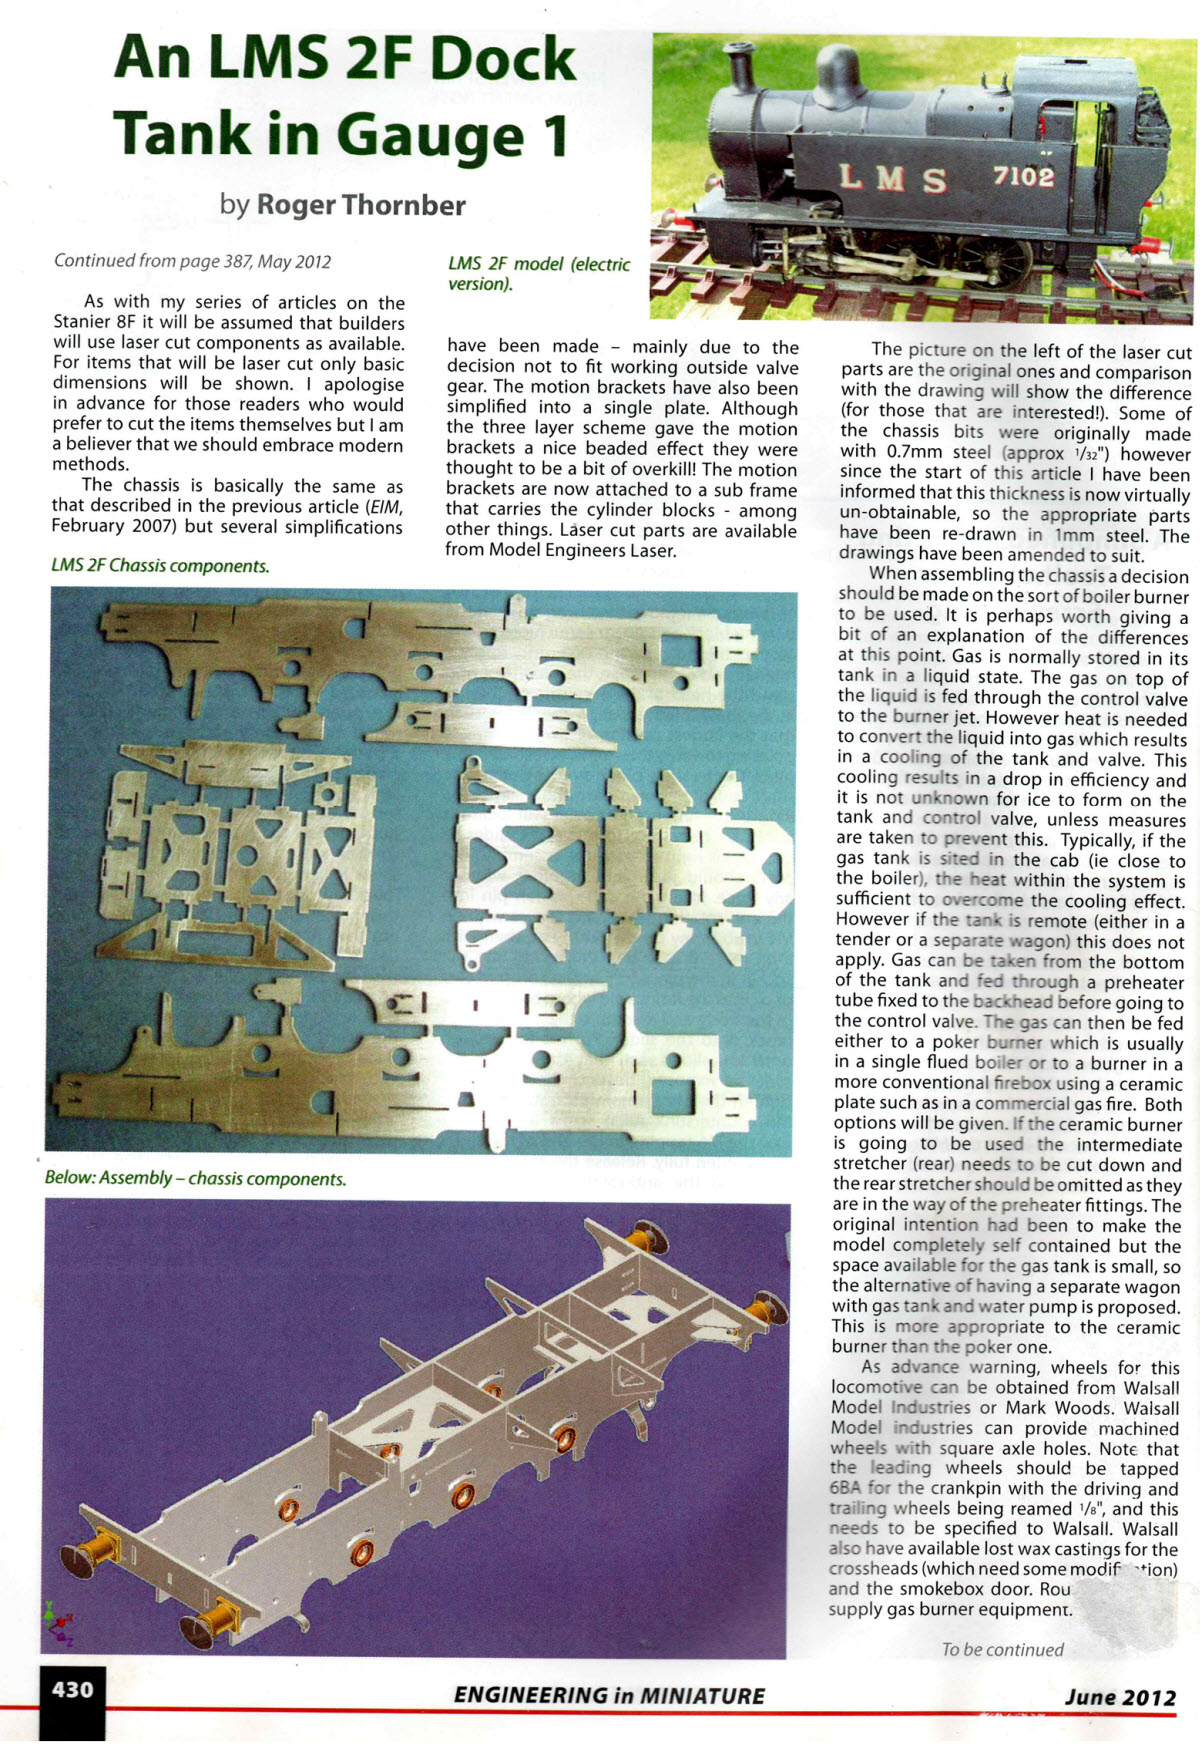
In the case of this engine the laser-cut parts did not come with any drawings. No dimensions. There was a series describing the construction of the engine in Engineering In Miniature magazine, but it was incomplete and lacked a lot of (sometimes critical) dimensions, particularly related to parts that were not in the laser-cut kit.
Engineering In Miniature June 2012 Instructions for the Gauge 1 LMS 2F
So in order to find those dimensions I spent a lot of unexpected time drawing up the model in CAD. Here is an example showing my details for the pins and bushes for the motion. NOTE: This CAD drawing is 100% my own work.
LMS 2F Dock Tank CAD Dwg MOTION 1 (Part)
Parts like the firebox and smokebox hardly got a mention and there were no dimensions and no laser-cut material.
Sometimes, the tabs along one edge of a plate didn’t all fit into the slots of the joining plate. A lot of time was spent with needle files trying to make the tabs fit. The problem is that you don’t know if the tabs are too long and if so in which direction (or both) or the slots are not wide enough.
In some cases tabs/slots already fitted along one edge prevent the tabs fitting into the slots on opposite or adjacent sides without excessive forcing and bending of the plates.
The method of permanently fixing the joints together is troublesome. Choices are soft or silver solder, slow setting adhesive (Loctite) or fast setting adhesive (superglue). Each has their merit and none is perfect in every case. All are messy needing laborious cleaning before painting.
So there were many extra time consuming issues I hadn’t expected.
But I did learn a lot about how best to build a model locomotive from laser-cut tab and slot parts. I learned such a lot from this experience that I know what to look out for and how to save time on a future build.
I could, in fact, write a book – or at least several articles – and make a few movies showing how to avoid the some of the pitfalls of tab and slot construction. Please let me know if you are interested, using the Form below.
In fact if I do go ahead I could possibly do a construction series not only on the LMS F2 Fowler Dock Tank (Phase 1 and Phase 2) but also illustrating what might be my next planned Gague 1 steam loco project build of “Evening Star” the last British Railways steam locomotive to be built. A magnificent looking 2-10-0 engine with laser-cut parts available in Gauge 1.
92000 9F British Railwas Locomotive Evening Star
Want More Info?
If you would like me to provide more details as discussed above please ask me using the Request For More Information Form below. Just to recap I’m offering to develop more details relating to:-
LMS 2F Fowler Dock Tank Phase 1 construction
LMS 2F Fowler Dock Tank Phase 2 construction
British Rail 9F “Evening Star”
Please give as much information as you can about what you would like to see in further developments of the LMS 2F and/or the BR 9 F Locos..
Phase 2
As explained above, the upcoming Phase 2 of the LMS F2 Fowler Dock Tank project will include the steam boiler, cylinders and associated running gear including the Walschaerts valve gear.
If you are interested in seeing articles and/or videos on this section of the Gauge 1 loco project please let me know via the above Form.