Mike Shows How To Rapidly And Easily Fit Any Vice, Grinder, Bender, Or Any Other Accessory To Your Workbench
On a previous Page called “How To Make A Steel Work Bench” Mike showed how he designed and constructed a DIY Steel Work Bench for 6,600 Baht In Thailand.
In his own words this is how Mike describes his workbench Fixture Plates:-
I would love to take credit for thinking of the following idea on my own, but the truth is, I saw a photo of someone else’s work while researching workbenchs on Google Images.
Having used “fixture plates” on other tooling long ago in my past working life, I immediately saw the value of implementing this concept on my own self-designed and built workbench. As George Hill noted in a comment, “a clear bench is much easier to work on and keep clean”.
The fixture plates I had in mind would be simple pieces of wood with a set of matching through holes such that any of the fixture plate could be bolted onto the workbench using the same set of holes pre-drilled into the workbench. A grid pattern of 9 holes are drilled into the table top, each spaced 3″ apart, which allows me the option of moving each fixture’s location on the table.
Placing the 3″ x 3″ grid in one of the table’s corners allows placement of the fixtures off to the side or the back of the workbench, or even both at the same time.
Each fixture can be easily un-bolted from the workbench and a different fixture quickly and easily attached in it’s place. To make the process of changing out fixtures as simple as possible, each hole in the workbench has a metal threaded insert; I used 8mm internal threaded inserts purchased from HomePro, though there are many others to choose from.
I’ve also learned to use my electric drill with a socket drive to quicken the process of removing and inserting all the bolts.
Each tool, (i.e. 6″ grinder & 5″ vice) are bolted onto the fixture plates by using metal inserts placed into the fixture plates.
Below are a few photos of a 6″ bench grinder and 5″ vice, each mounted to it’s own fixture plate, and shown in various mounting configurations on the workbench top.
Once I buy or build a hand cranked tube bending jig, I will mount it to it’s own fixture plate so that it too can be easily attached to the workbench.
Photos Of The Workbench Fixture Plates
Above: Workbench top with 8mm metal inserts.
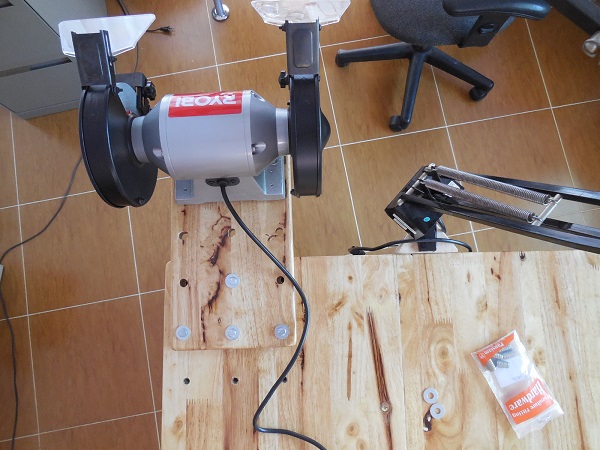
Above: The bench grinder is cantilevered out from the work bench top work surface on it’s own fixture plate.
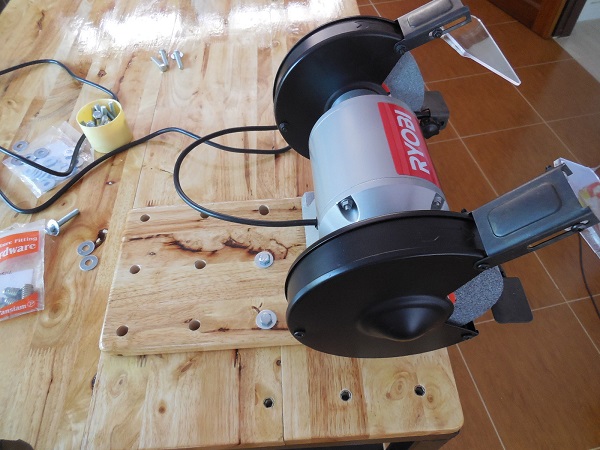
Above: The fixture plates for the bench grinder has been moved further into the workbench top surface.
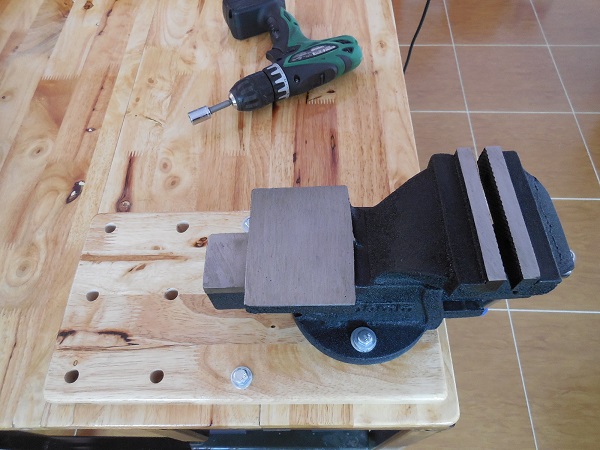
Above In the foreground is the vice on it’s fixture plate and in the background is the cordless power drill with socket to speedily insert and tighten the fixture plate’s 8 mm screws.
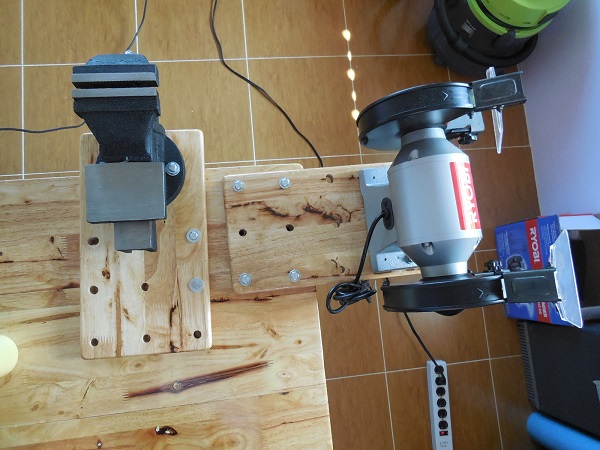
Above: Both the bench vice and the bench grinder fixed to the workbench via their respective fixture plates.


Good morning all,
I can well understand Georges comment. When I went to visit him and his model engineering workshop one thing that stood out was how clean and tidy it was and I remarked to George on this point.
Not only were the work benches clean and clear, the lathe and milling machines were cleaned down with not a trace of swarf anywhere.
This neatness and cleanliness is reflected in Georges models too. Also in his photo presentations where everything is neatly arranged and there are no items in the photo that shouldn’t be there.
I’m afraid I’m in the must do better category when it comes to tidiness and clutter. But at least the clutter on my benches is arranged in logical piles. There’s an order to my clutter.
Alan
Good morning Mike and fellow metal men.
From the photographs the bench and the surrounding area looks clean neat and tidy. It makes working a pleasure if the work area is light and clean. I always found when I ran a workshop in the middle- east the men turned out a better job if the area and tools were tidy and in good working order. The right tools are easier to locate and use. Congratulations on a very professional job.
George