How I Screwcut ‘Perfect’ 5/8″ Threads On The Kinwa CH 430 X 1100 Lathe On My First Attempt
My model engineering workshop in Thailand – and the large Kinwa CH 430 X 1100 Lathe that I bought to machine the castings for a half full-size model of a Little Samson steam traction engine – is put to use for other purposes.
This page shows how I cut 5/8″ (about 16 mm diameter) Whitworth threads 2″ long on 24 Number pieces of round steel, these being needed for a construction project of ours.
Included are photos of the set-up and movies of the screwcutting in action. The screw threads were cut on my Kinwa CH 430 X 1100 Lathe in my retirement workshop in Pakchong (Pak Chong), Thailand.
This Is The First Attempt At Screwcutting – I Had Never Cut A Thread On A Lathe Before In My Life!
What I mean by screwcutting is threading using a single-point tool ~ I have cut plenty of threads on lathes using a die and that is hard work.
I have found that as the size of the bar being cut by the die (die being held for example in the tailstock die-holder and bar held in the three jaw chuck) that there is an increasing tendency for the work to slip in the chuck, scoring the work and potentially damaging the chuck jaws.
Above 1/4″ or 6 mm diameter this starts to manifest itself on my mid-size lathe.
At 5/8″ Whitworth I knew that this would be too large to allow die threading in the lathe even on the large Kinwa lathe. I decided to screwcut the threads to almost finished size and to finish them off using a die in a hand-held diestock and with the steel bar being held in a bench vice.
A Movie Showing The Scewcuting In Action On The Kinwa CH 430×1100 Lathe
I’ll explain the lathe and lathe cutting tool set-up in a minute but let’s have a bit of fun first and watch a short movie of the lathe in action:-
The Lathe and Lathe Cutting Tool Set-Up for Screwcutting
There are two slightly unusual aspects to the method and tool set-up I used to cut the threads on the Kinwa CH 430×1100 lathe.
The handbook that came with the Kinwa lathe said that the lead-screw nuts cannot be disengaged with cutting an Imperial thread on a lathe with a metric leadscrew and vice versa.
Even the screwcutting dial doesn’t change this and in these circumstances it can’t be used to re-engage the leadscrew.
I was loathe to thread towards the headstock into a ‘landing grove’ in case I overshot and ploughed the cutting tool into the plain bar.
Instead, I decided to prepare a landing groove close to the chuck and cut in reverse away from it. There are two ways to do this:-
- Cutting tool upside down in front of the work.
- Cutting tool right-way up but behind the work.
I studied both options and discovered that the toolpost on the Kinwa is in a fixed position on the top and cross slide, meaning that it couldn’t be moved far enough backwards to allow option 2 above.
So it was an upside down tool in front of the work.
There was another complication in that the work protruding from the chuck was extremely close to touching the toolpost and this required further thought to eliminate.
Description Of The Lathe Thread-Cutting Tool Setup
I didn’t have any ready-made threading tool so I had to grind one up from a piece of HHS tools steel.
This wasn’t quite as bad a job as it sounds since I was using the Eccentric Engineering diamond tangential tool holder therefore mass metal removal by grinding was minimised.
The instructions that come with their tangential tool holder describe a method of grinding tools for thread cutting using the jig provided. I studied these instructions several tines and remained as perplexed as I was in the beginning!
So I decided to grind the tool on the off-hand grinder by setting the tool rests to each required angle in turn.
Next came choosing a holder. Because of the close proximity of the bar to to be threaded to the face of the quick-change tool holder (shown in the photos below) the normal right-hand tool holder couldn’t be used. The left hand toolholder was fine, though.
Here, then is a summary of the tool setup to screw-cut 5/8 inch Whitworth threads using a lathe with a metric leadscrew:-
- Cut left-to-right with the lathe spindle running in reverse.
- 1/4″ HSS toolbit held in a tangential toolholder.
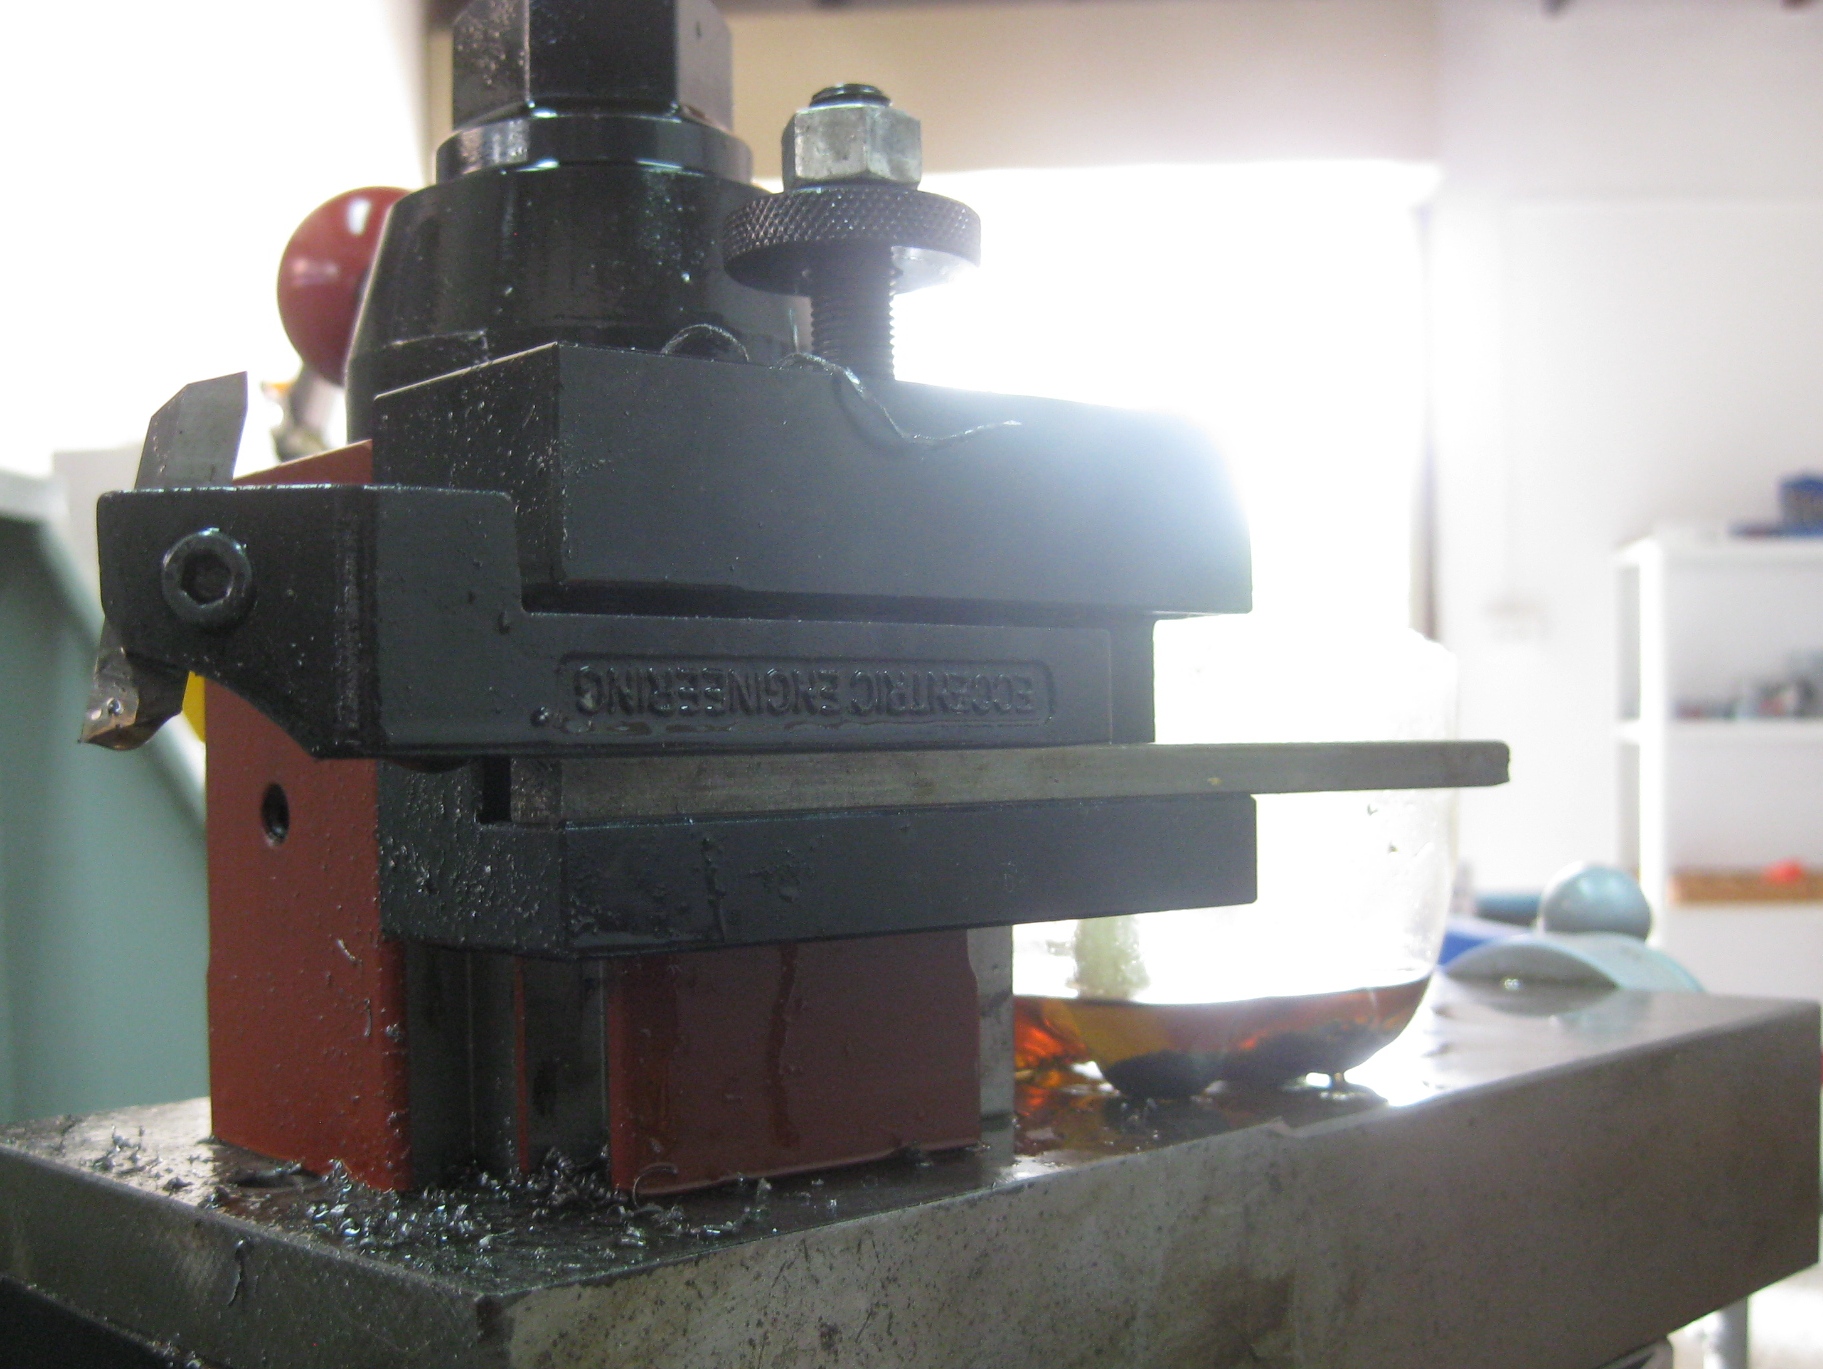
- Diamond tangential toolholder selected as right-hand and mounted upside down in the toolpost.
Photos Of The Lathe Tool Setup For Cutting Screw Threads In The Kinwa Lathe
Here are some photos of the lathe tool as set up and in use:-
First a general view of the tangential toolholder in the toolpost and showing the upside-down orientation:-
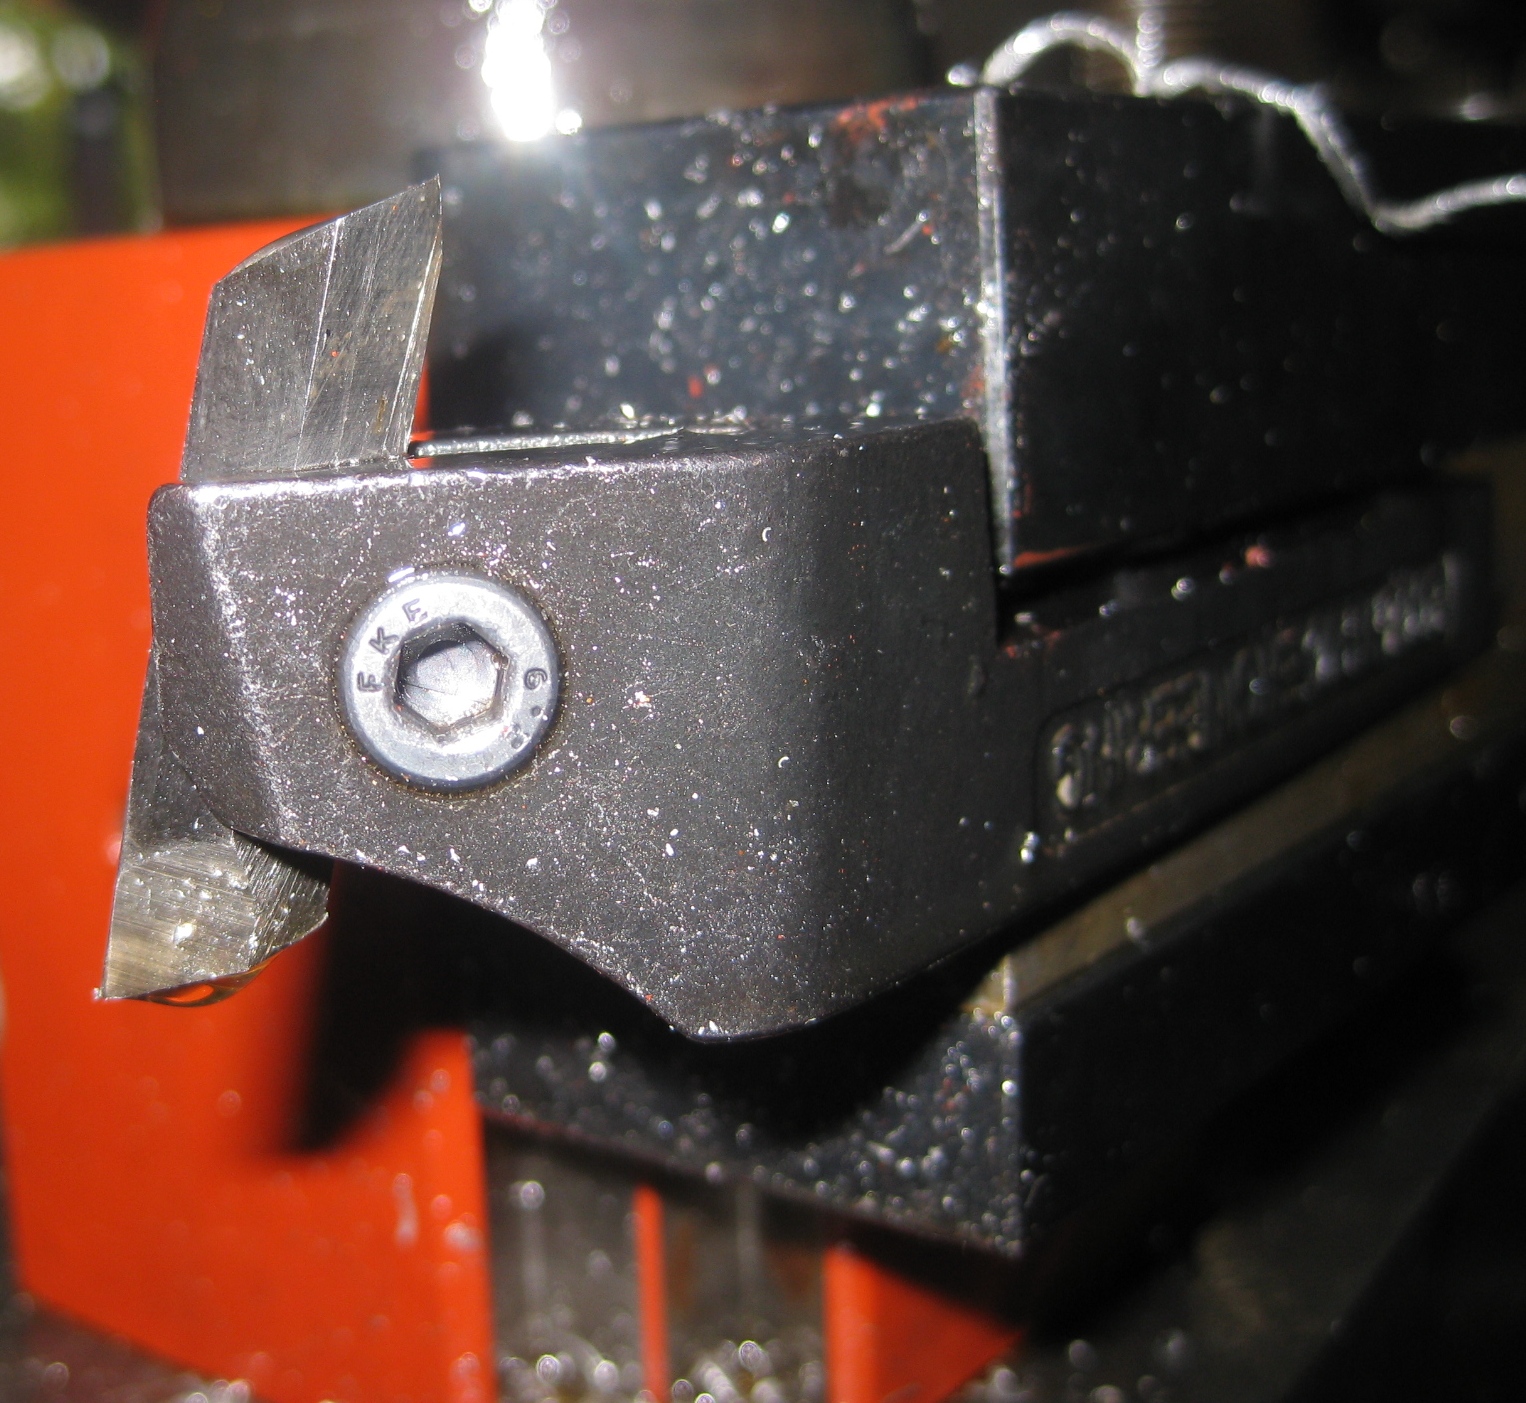
Next, a close-up of the tool bit:-
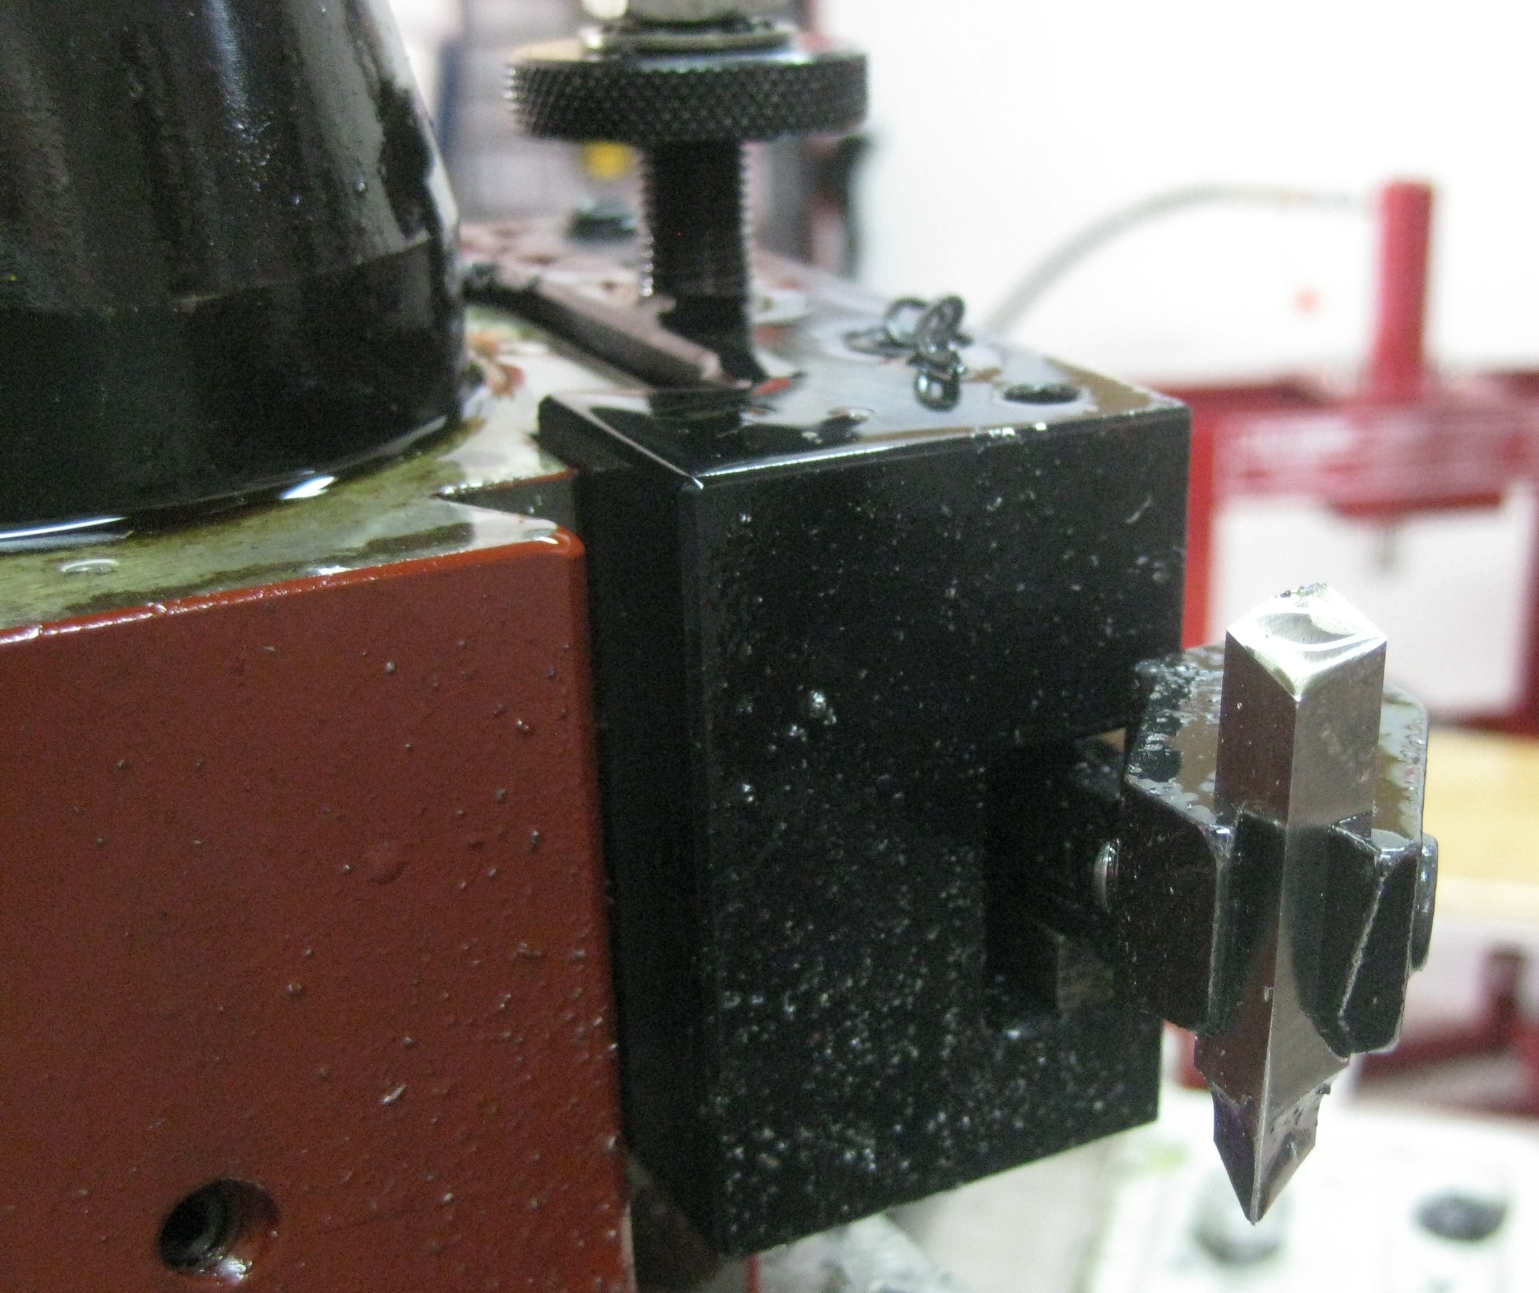
The next photo shows the geometry of the tool tip for screwcutting. BSW is 55 deg included angle.
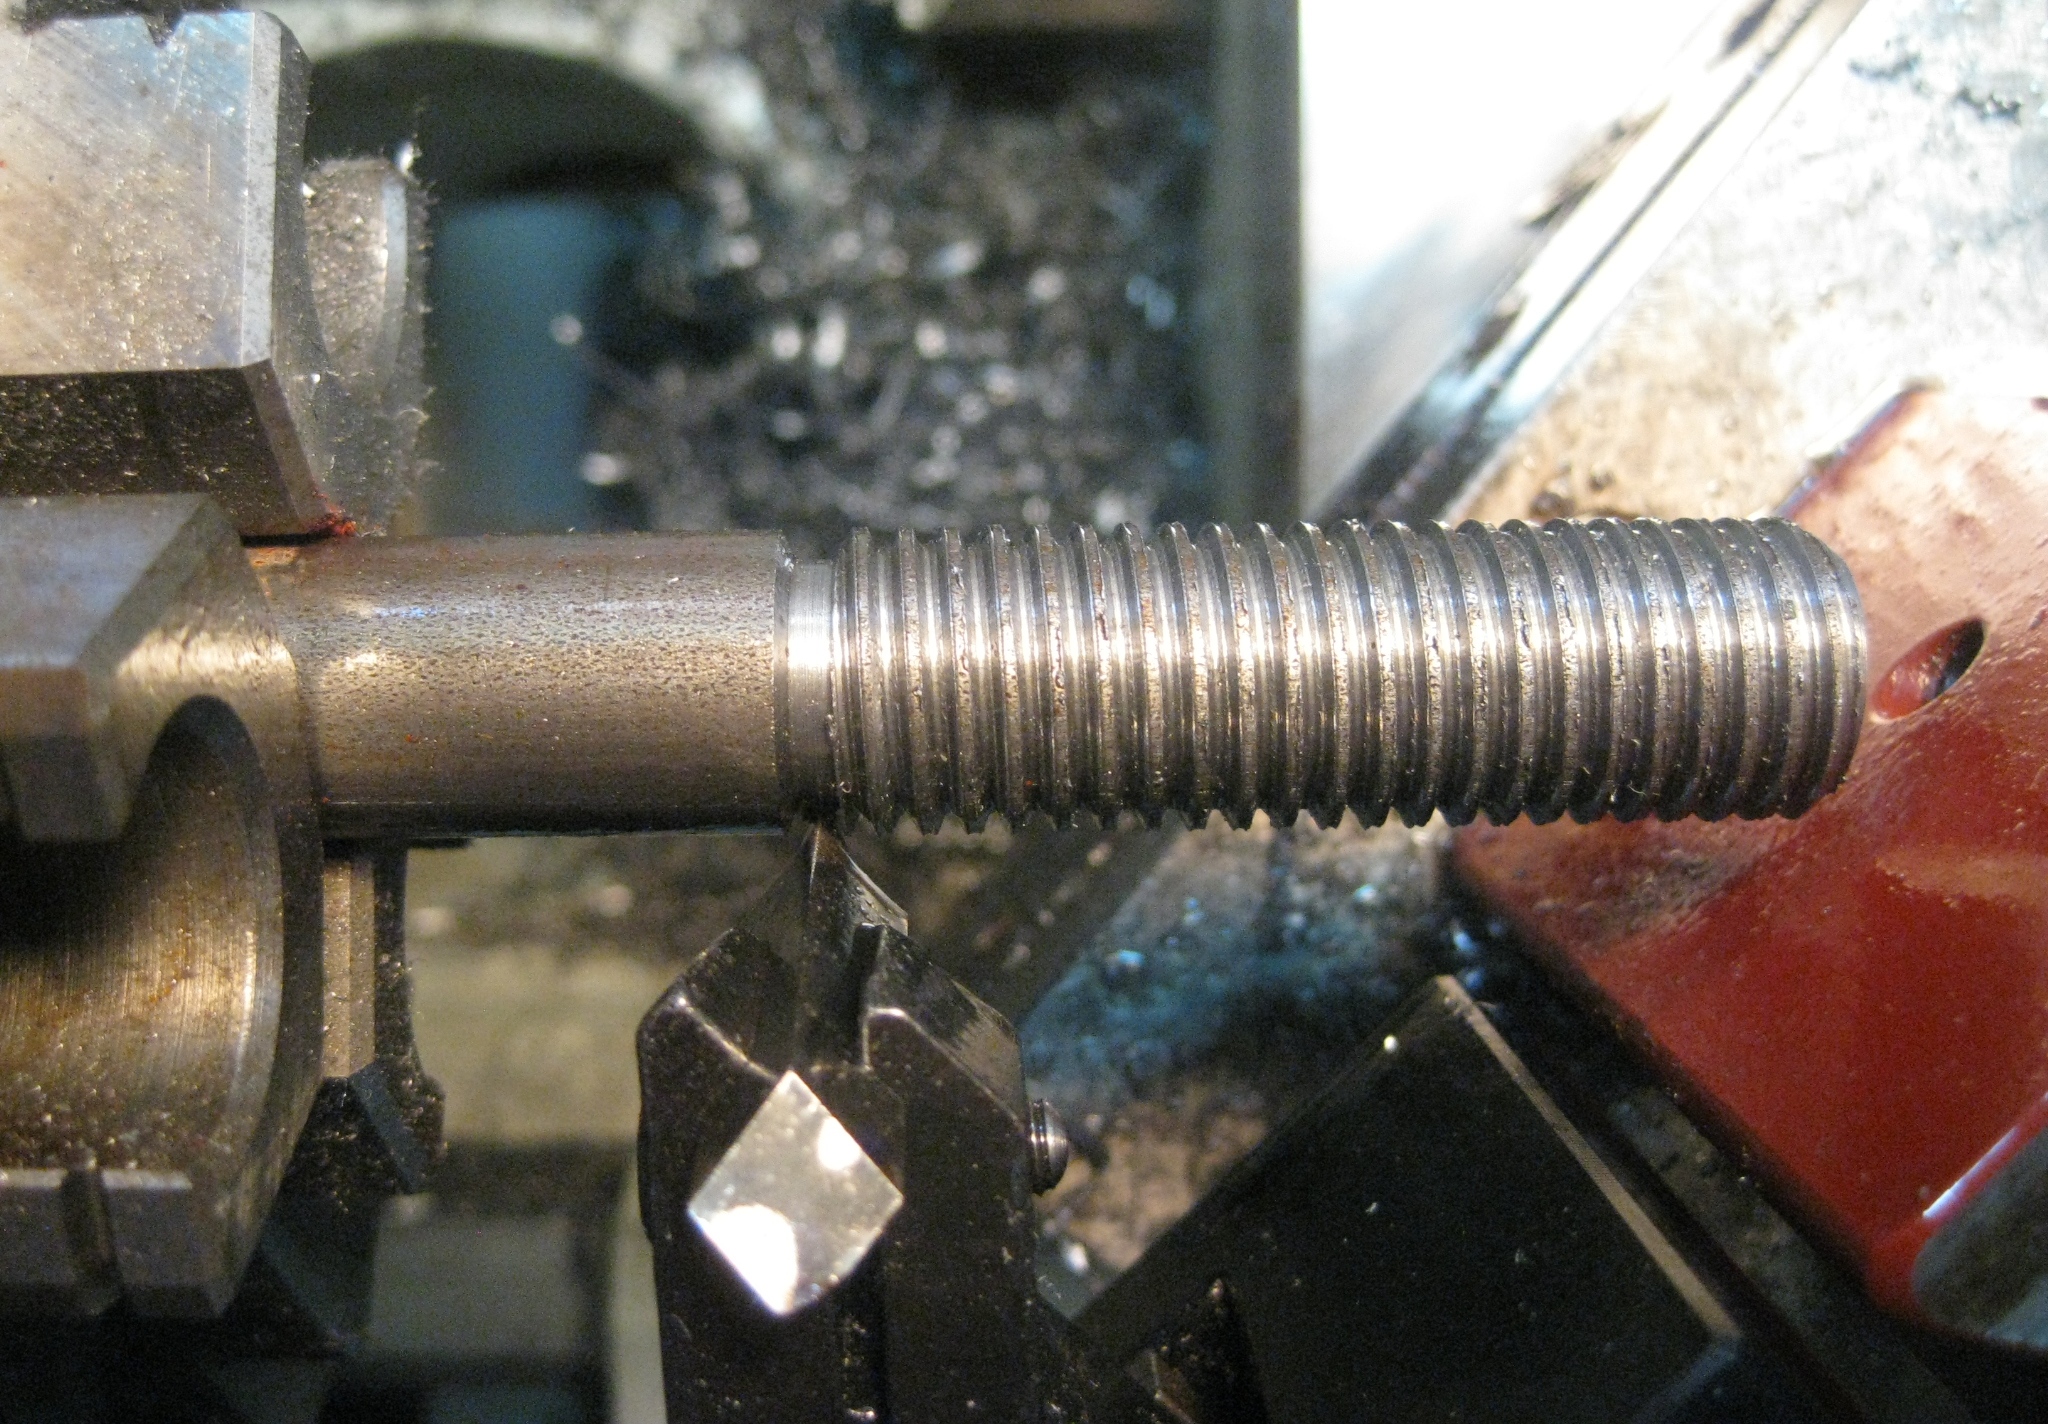
The next photo shows the view from above the tool during the actual cutting operation.
The cutting portion of the tool bit is in the landing groove ready for the next cut.
Notice how close the end of the screw-cut bar is to the tooplost (identifiable by the red colour).
So Where Are the Finished Screwcut Pieces?
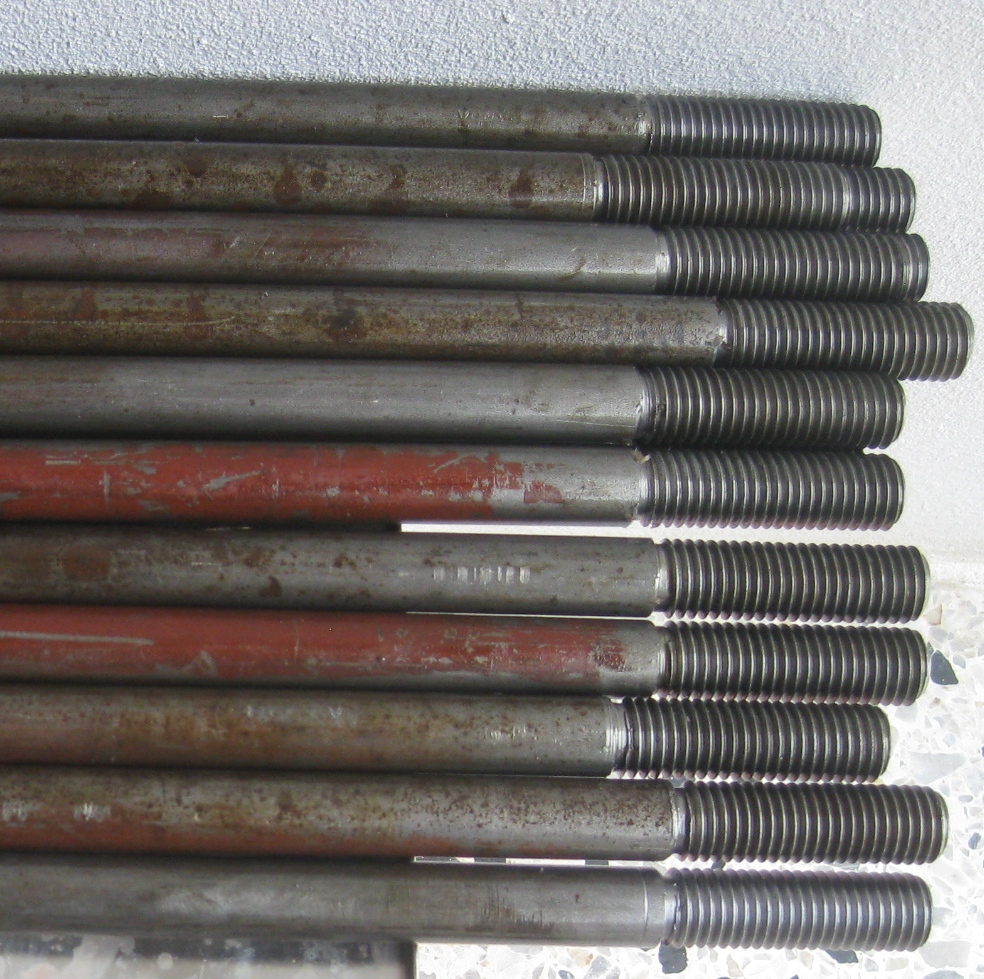
Below is a photo of some of the screwcut bars. The others have been taken away to be used.
And yes, the nut do fit nicely, thank you.
I should just clarify that all the screw-cut bars were taken to a bench vice where a 5/8″ Whitworth die was run down the threads using a hand-held die holder.
Without the screwcutting operation first this would have been impossible.
